

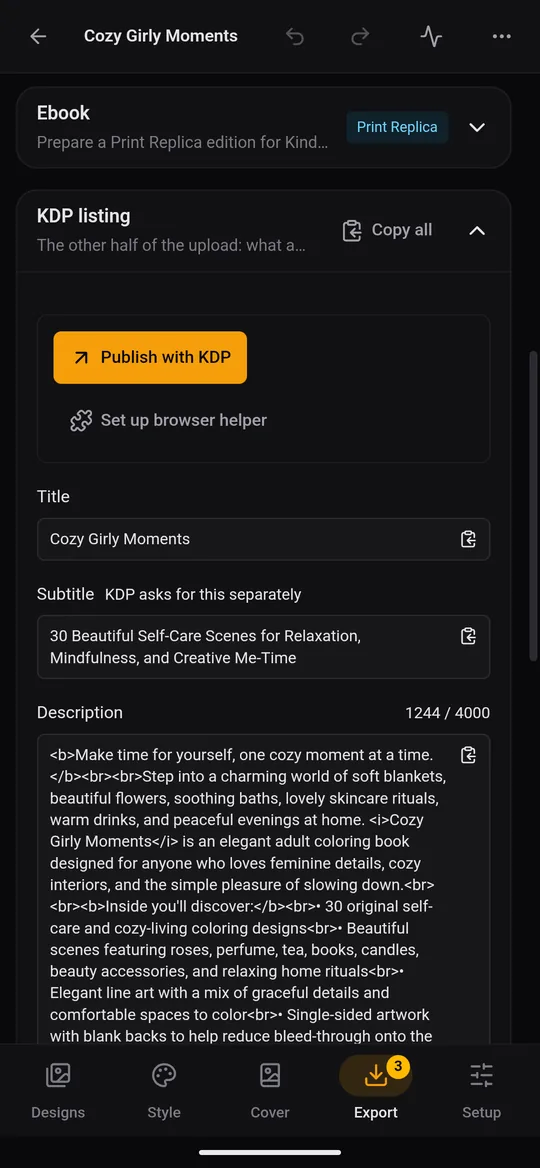
KDPify prepares everything KDP asks for in the book's Export tab: the two PDFs, and in KDP listing your title, subtitle, description, keywords and categories, ready to copy. There are two ways to use it:
- Automatically: the KDPify browser extension fills in KDP for you, uploads the PDFs and stops at pricing. See Auto-publish on KDP with the KDPify browser extension.
- By hand: copy each line into KDP yourself, as this lesson shows. It also explains what every KDP field means, which is worth reading once even if you use the extension.
You need the interior PDF and cover PDF from the Export tab, and the KDP listing from the same tab. Save the PDFs somewhere you can find them (Downloads or Documents). You can do this from the phone's browser, but a computer is more comfortable for a first book.
On kdp.amazon.com, open the Bookshelf and choose + Create, then Paperback. KDP has three pages to fill in.
1. Paperback details
Open the book's Export › KDP listing in KDPify. Tap a line to copy it, then paste it into KDP:
- Language, Book title and Subtitle (KDP asks for the subtitle in its own box).
- Author: the same name or pen name you use on the cover.
- Description: what the reader gets. Up to 4,000 characters.
- Publishing rights: choose that you own the copyright.
- Primary audience: confirm it isn't sexually explicit, and set a reading age for children's books.
- Primary marketplace: usually Amazon.com.
- Categories: up to 3. Pick the most specific ones that fit.
- Keywords: 7 boxes. Words buyers would type, other than those in your title.
- Low-content book: tick it only for books like journals and colouring books if you don't want an ISBN.
Then Save and Continue.
2. Paperback content
- Print ISBN: take KDP's free ISBN (skipped for low-content books).
- Print options: these must match your KDPify book (see Setup › Trim, paper & details):
- Ink and paper type: black ink on white or cream paper for line art and greyscale; standard or premium colour for colour books.
- Trim size: the same size as the book in KDPify.
- Bleed: choose No bleed. KDPify lays out interiors with KDP's no-bleed margins.
- Cover finish: matte or glossy, your choice. Matte suits colouring books.
- Manuscript: upload the interior PDF.
- Book cover: choose Upload a cover you already have, then upload the cover PDF.
- AI-generated content: answer Yes for images if ChatGPT or Gemini drew them, and pick the tool.
- Book preview: tap Launch Previewer and page through the whole book. KDP flags anything outside the margins. Fix problems in KDPify, export again and re-upload.
3. Paperback rights & pricing
- Territories: All territories (worldwide) unless you have a reason not to.
- Price: type a price. KDP shows the printing cost and your royalty for each marketplace as you type. On Amazon.com, a list price of $9.99 or more earns a higher royalty rate than a lower price, so check what you keep before you settle on a number. KDPify's Setup tab shows the print cost and the lowest price KDP accepts, to give you a starting point. To try prices before you get there, the free KDP royalty calculator shows the printing cost and royalty for any trim size, page count and price.
- Proof copy: order a printed proof (you pay printing and shipping) to hold the book in your hands before buyers do. It's the best way to catch problems with darkness, margins and colours.
Tap Publish Your Paperback Book. KDP reviews it, usually within 72 hours, and emails you when it's live on Amazon.